How to block all websites except one in Windows 10 / 11 | Whitelisting website in Windows 10 using hosts file
The most efficient way to make a whitelist of approved websites in Windows 10 is to modify hosts file.
Step 1: we are "blocking" all websites
Actualy, we are not really blocking websites, but only redirecting them all to localhost.
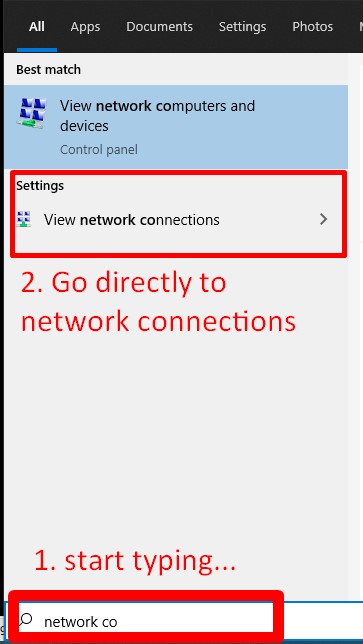
First of all, let'g open our network connections settings. The fastest way is to start typing "network connections" in windows search bar and find the propriate menu item. In the end it's up to you how you reach the menu "Network and Internet → Network connections":
Then we have to choose our network connection. In my case it's Wi-Fi connection which I use. In your case the name of the network can be different. In case you are using wired connection, all the steps are the same.
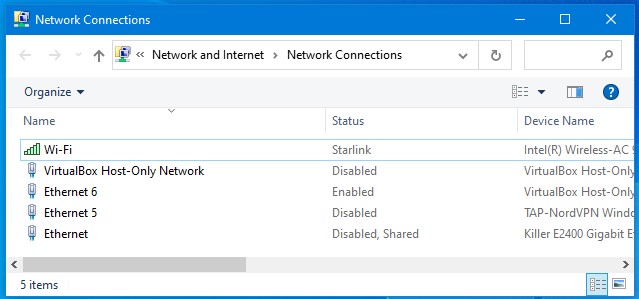
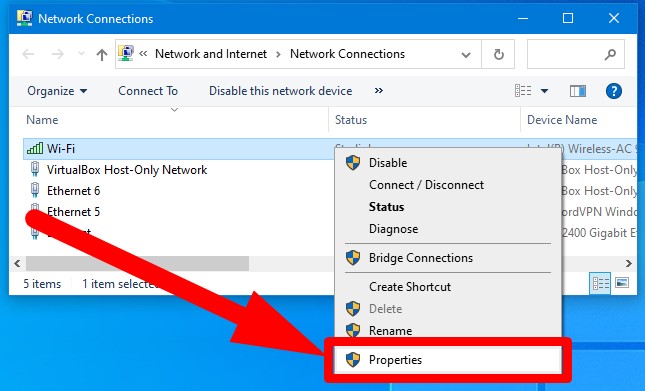
Then choose your network and view its properties:
In properties you have to find "Internet Protocol Version 6 (TCP/IPv6) and uncheck it:
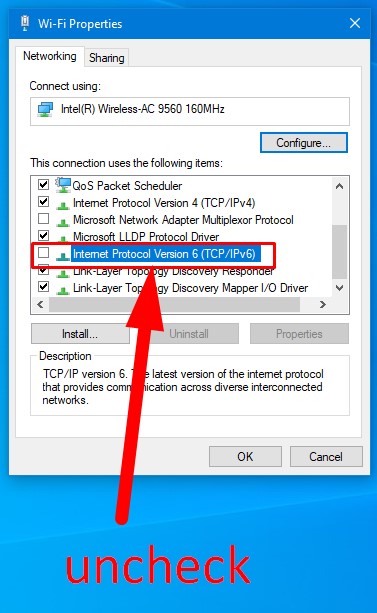
After that, find the item "Internet Protocol Version 4 (TCP/IPv4)" and view its properties as shown on a screenshot:

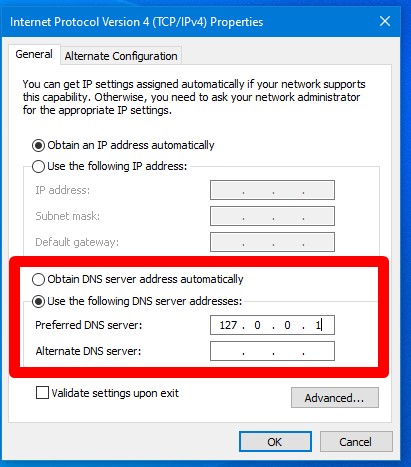
In Internet Protocol Version 4 (TCP/IPv4) Properties find the section below, where DNS servers are set up.
You should set an IP: 127.0.0.1 as Preferred DNS server:
Afte that step you can open windows terminal (cmd.exe) and run a command "ipconfig /flushdns" to be sure that now all dns redirections are working just good:
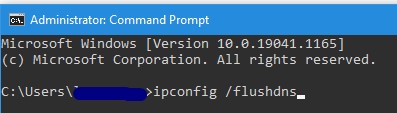
Now you actually tell your computer to redirect all website to your machine (localhos), what means that it will be not possible to view them.
Step 2: allow only websites you need (whitelist)
Modifying hosts file in Windows and creating a list of allowed websites allows you to enable access only to websites you need or approve.
File hosts in Windows is located in the following folder:
C:\Windows\System32\Drivers\etc\hosts
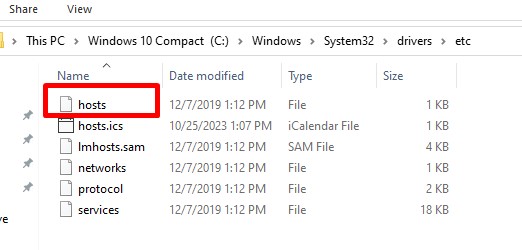
Keep in mind, that file hosts has no file extension.
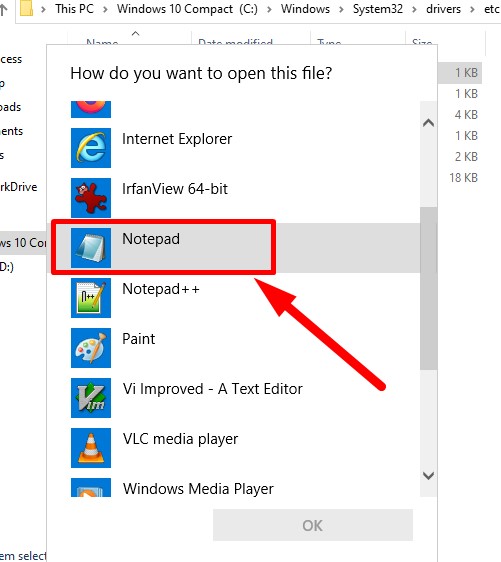
Then you just click with Right mouse button the file and choose "open with" option:
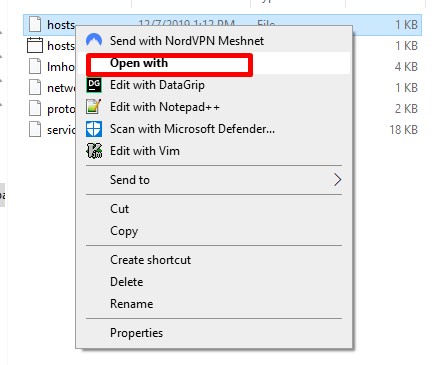
And choose "Notepad" or any other text editor (as you can see on screenshot, I have Notepad++ or Vim, the choice is up to you):
Now this is how hosts file look by default:
# Copyright (c) 1993-2009 Microsoft Corp.
#
# This is a sample HOSTS file used by Microsoft TCP/IP for Windows.
#
# This file contains the mappings of IP addresses to host names. Each
# entry should be kept on an individual line. The IP address should
# be placed in the first column followed by the corresponding host name.
# The IP address and the host name should be separated by at least one
# space.
#
# Additionally, comments (such as these) may be inserted on individual
# lines or following the machine name denoted by a '#' symbol.
#
# For example:
#
#      102.54.94.97     rhino.acme.com          # source server
#       38.25.63.10     x.acme.com              # x client host

# localhost name resolution is handled within DNS itself.
#    127.0.0.1       localhost
#    ::1             localhost
As you see, all line beginning with "#" are ignored by the system. So, let's make a new section for our whitelist:
# My whitelist
and after that we add websites we allow to visit on the PC we are working on now:
62.247.138.220 edustorage.net
First we write an IP address of a website, then we put space and then we put an URL of a website.
So, our hosts file now looks like this:
# Copyright (c) 1993-2009 Microsoft Corp.
#
# This is a sample HOSTS file used by Microsoft TCP/IP for Windows.
#
# This file contains the mappings of IP addresses to host names. Each
# entry should be kept on an individual line. The IP address should
# be placed in the first column followed by the corresponding host name.
# The IP address and the host name should be separated by at least one
# space.
#
# Additionally, comments (such as these) may be inserted on individual
# lines or following the machine name denoted by a '#' symbol.
#
# For example:
#
#      102.54.94.97     rhino.acme.com          # source server
#       38.25.63.10     x.acme.com              # x client host

# localhost name resolution is handled within DNS itself.
#    127.0.0.1       localhost
#    ::1             localhost

# My whitelist
62.247.138.220 edustorage.net
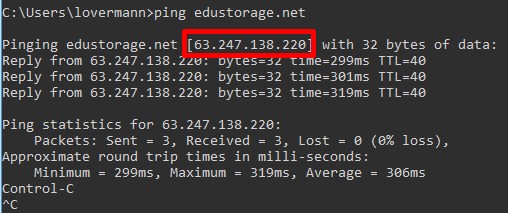
If you don't know, how to get an IP-address of a website in windows, you can easily use CMD terminal and a command ping, for example:
Now you can try to open any page in any browser in your Windows 10 system and you will see, that you can surf only allowed website from you whitelist.